
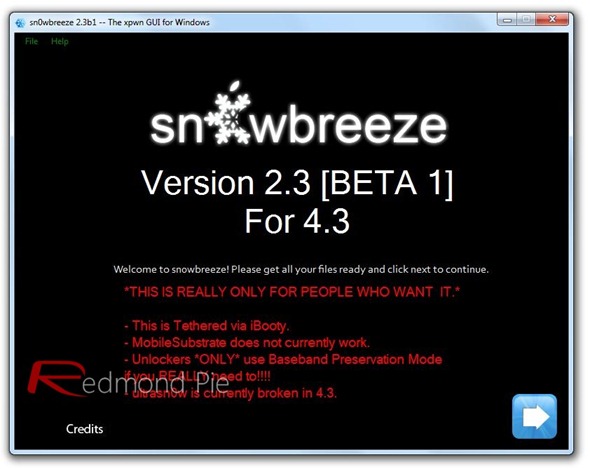
Sn0wbreeze 2.3b1 is now available for Windows users to jailbreak iOS 4.3 running on iPhone 4, 3GS, iPad and iPod touch. Just like PwnageTool for Mac, Sn0wbreeze jailbreaktethered for all devices, which means you will have to boot into a jailbroken state every time you reboot your device. is also

For Mac users, we have already covered extensive tutorials on how to jailbreak iOS 4.3 using PwnageTool:
Creating Custom iOS 4.3 Firmware On Windows
Step 1: First up, download all the required tools and files to your Windows desktop:
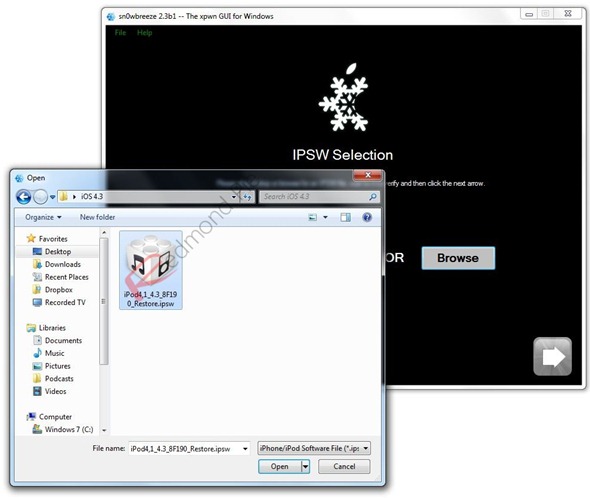
Step 3: Select the required firmware .ipsw file for your iOS device by clicking on the “Browse” button.
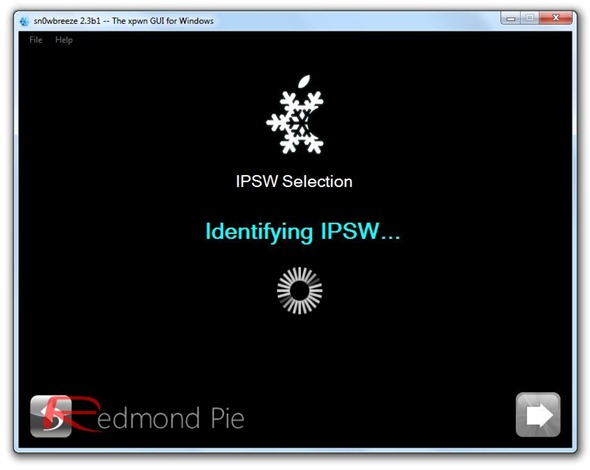
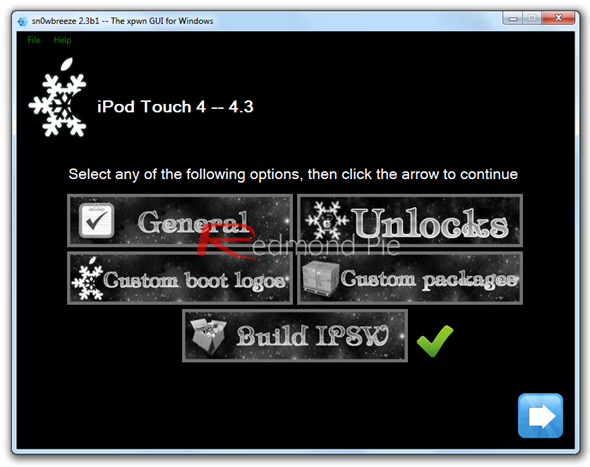
Step 4: Sn0wbreeze will now identify the selected IPSW file. Once done, click the next “blue” colored arrow to proceed.
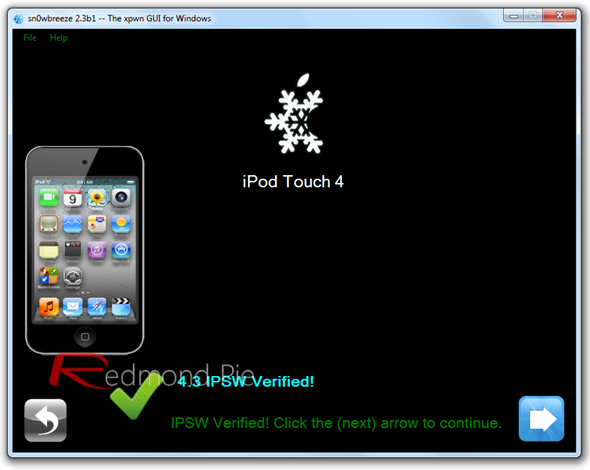
Step 5: Now select the “Expert Mode”, followed by “Build IPSW” option to start creating your custom firmware.
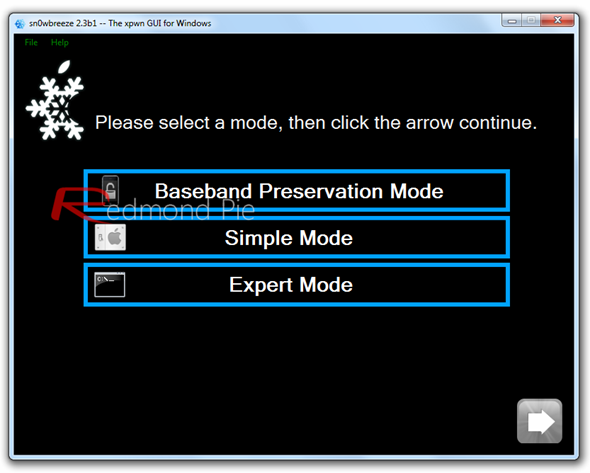
Note: If your iPhone relies on a unlock, proceed only by selecting “Baseband Preservation Mode” option instead of “Expert Mode”.
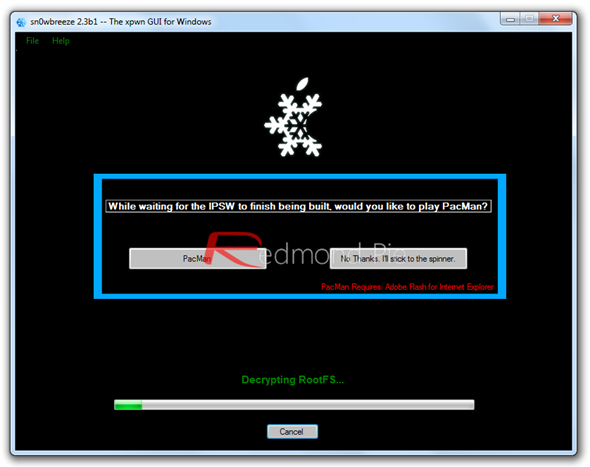
Since building custom firmware may take some time, you can optionally play Pac-Man game to kill some time.
Step 6: Sn0wbreeze will greet you with the following “Done!” message when the custom firmware has been successfully created.
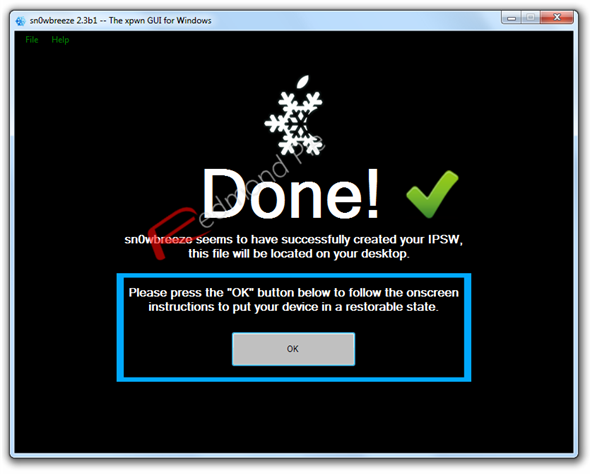
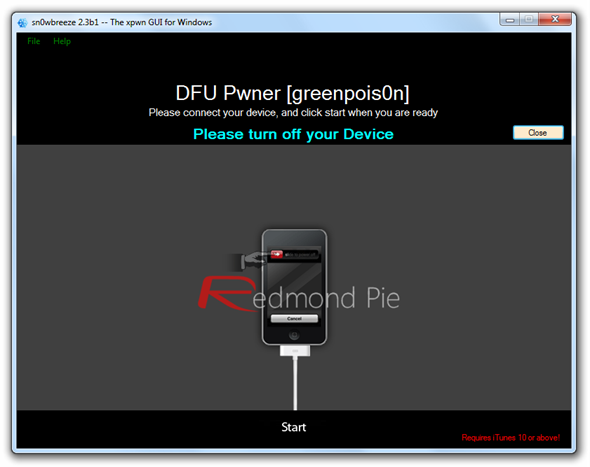
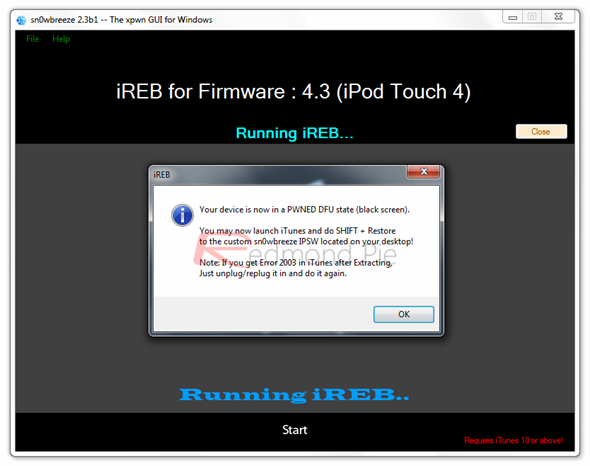
Step 7: Now follow the onscreen steps to enter DFU mode using Sn0wbreeze:
Restore iOS 4.3 Custom Firmware Using iTunes
Step 8: Start iTunes, click on your iOS device icon from the sidebar in iTunes. Now press and hold Left “Shift” button on the keyboard and then click on “Restore” (Not “Update” or “Check for Update”) button in iTunes and then release this button.

This will make iTunes prompt you to select the location for your custom firmware 4.3 file. Select the required custom .ipsw file that you created above, and click on “Open”.
Step 9: Now sit back and enjoy as iTunes does the rest for you. This will involve a series of automated steps. Be patient at this stage and don’t do anything silly. Just wait while iTunes installs the new firmware 4.3 on your iOS device. Your iOS device screen at this point will be showing a progress bar indicating installation progress. After the installation is done, your iOS device will be jailbroken on iOS 4.3.
Booting in Tethered Mode
Last but not the least, since there is no
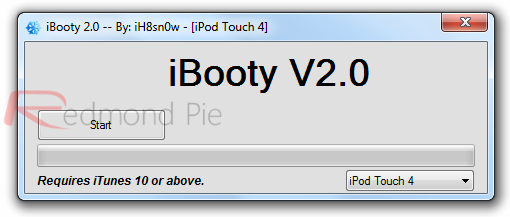
Step 10: Run iBooty for Windows and select your iOS device from the dropdown menu.
Note: iBooty is extracted to the desktop (iBooty-for-4.3) after running Sn0wbreeze 2.3.
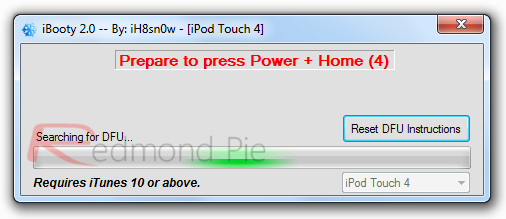
Step 11: Now hit the “Start” button and follow the instructions on screen to enter your device in DFU mode:

For Mac users, we have already covered extensive tutorials on how to jailbreak iOS 4.3 using PwnageTool:
-
Ziyaretçiler için gizlenmiş link,görmek için Log in or register now.
-
Ziyaretçiler için gizlenmiş link,görmek için Log in or register now.
-
Ziyaretçiler için gizlenmiş link,görmek için Log in or register now.
-
Ziyaretçiler için gizlenmiş link,görmek için Log in or register now.
Ziyaretçiler için gizlenmiş link,görmek için
Log in or register now.
for
Ziyaretçiler için gizlenmiş link,görmek için
Log in or register now.
yet. If your iPhone relies on a
Ziyaretçiler için gizlenmiş link,görmek için
Log in or register now.
, DO NOT update to stock iOS 4.3 yet.Creating Custom iOS 4.3 Firmware On Windows
Step 1: First up, download all the required tools and files to your Windows desktop:
-
Ziyaretçiler için gizlenmiş link,görmek için Log in or register now.and install iTunes 10.2.1 for Windows.
-
Ziyaretçiler için gizlenmiş link,görmek için Log in or register now.Sn0wbreeze 2.3 for Windows.
-
Ziyaretçiler için gizlenmiş link,görmek için Log in or register now.iOS 4.3 (Final) for iPhone, iPad or iPod touch.
Step 3: Select the required firmware .ipsw file for your iOS device by clicking on the “Browse” button.
Step 4: Sn0wbreeze will now identify the selected IPSW file. Once done, click the next “blue” colored arrow to proceed.
Step 5: Now select the “Expert Mode”, followed by “Build IPSW” option to start creating your custom firmware.
Note: If your iPhone relies on a unlock, proceed only by selecting “Baseband Preservation Mode” option instead of “Expert Mode”.
Since building custom firmware may take some time, you can optionally play Pac-Man game to kill some time.
Step 6: Sn0wbreeze will greet you with the following “Done!” message when the custom firmware has been successfully created.
Step 7: Now follow the onscreen steps to enter DFU mode using Sn0wbreeze:
- Hold Power and Home buttons for 10 seconds
- Now release the Power button but continue holding the Home button for 10 more seconds
- You device should now be in DFU mode
Restore iOS 4.3 Custom Firmware Using iTunes
Step 8: Start iTunes, click on your iOS device icon from the sidebar in iTunes. Now press and hold Left “Shift” button on the keyboard and then click on “Restore” (Not “Update” or “Check for Update”) button in iTunes and then release this button.
This will make iTunes prompt you to select the location for your custom firmware 4.3 file. Select the required custom .ipsw file that you created above, and click on “Open”.
Step 9: Now sit back and enjoy as iTunes does the rest for you. This will involve a series of automated steps. Be patient at this stage and don’t do anything silly. Just wait while iTunes installs the new firmware 4.3 on your iOS device. Your iOS device screen at this point will be showing a progress bar indicating installation progress. After the installation is done, your iOS device will be jailbroken on iOS 4.3.
Booting in Tethered Mode
Last but not the least, since there is no
Ziyaretçiler için gizlenmiş link,görmek için
Log in or register now.
Ziyaretçiler için gizlenmiş link,görmek için
Log in or register now.
for iOS 4.3 yet, we will have to boot it into a tethered jailbroken state. To do this, we will make use of a utility on Windows named “iBooty” as shown in the steps below.Step 10: Run iBooty for Windows and select your iOS device from the dropdown menu.
Note: iBooty is extracted to the desktop (iBooty-for-4.3) after running Sn0wbreeze 2.3.
Step 11: Now hit the “Start” button and follow the instructions on screen to enter your device in DFU mode:
- Hold Power and Home buttons for 10 seconds
- Now release the Power button but continue holding the Home button for 10 more seconds
- You device should now be in DFU mode